


- powdered graphite over portrait area
- use pen to transfer basic outline to collage
- take a picture (photo image and collage)
- use charcoal pencil and eraser to add value and define form
- take a picture
|
0 Comments
(5th block) If there was a glare on your images use the link below to get your pictures: https://drive.google.com/drive/folders/11ORSZHHzy3KBh6Ma7NJkmPCHb5Nml0b0?usp=sharing Warm UP:
Get your collage and photo-transfer. How does your transfer image look on top of your collage? Is there enough contrast? Consider alteration choices:
Task#1: Prep Collage
Task#2: Glue
add your image to the photo-transfer slide add reflection for this process Task#4: Mixed Media Portrait Warm-Up: Get your images
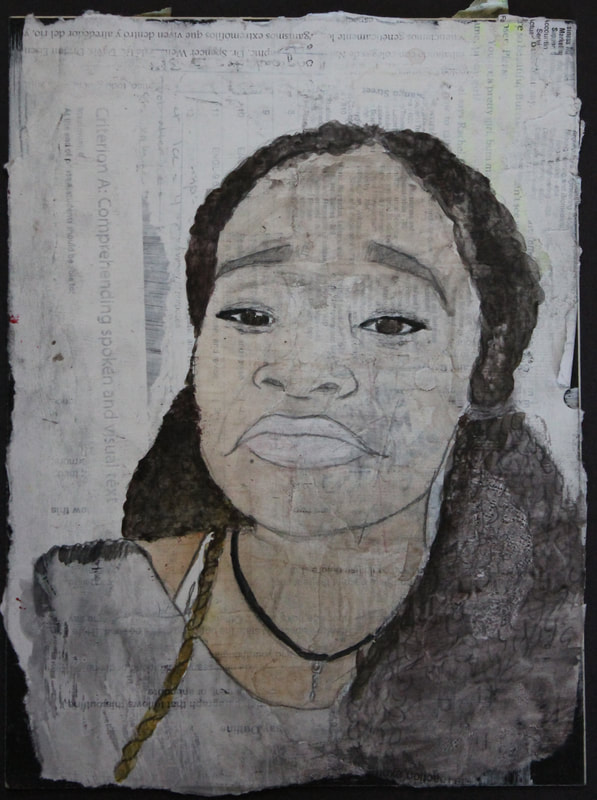
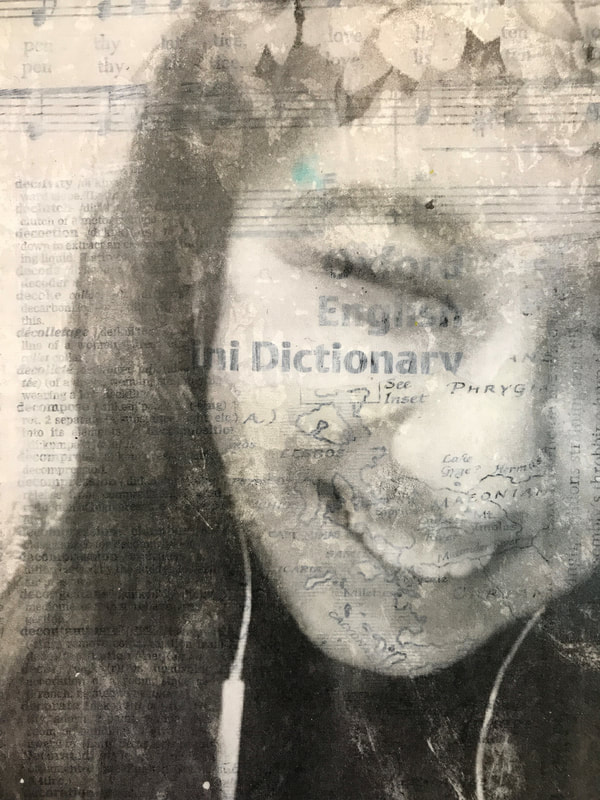
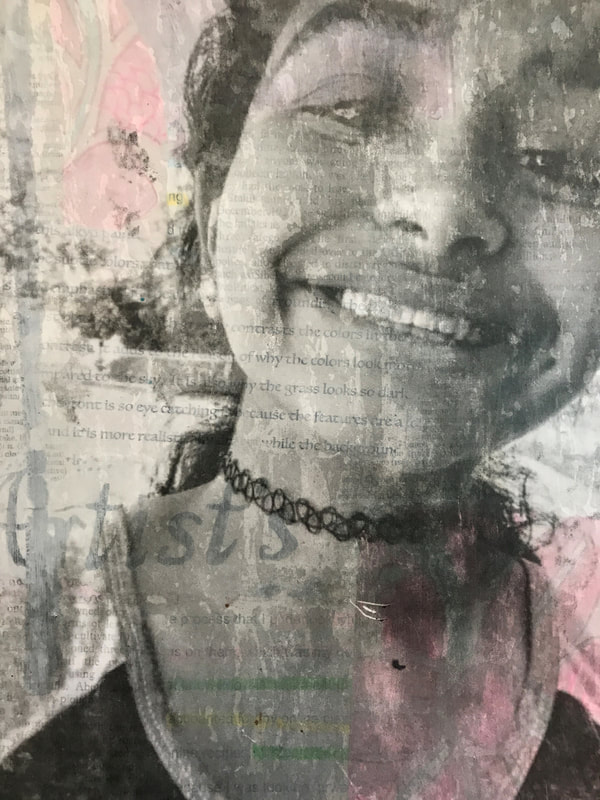
Reflect on the similarities and differences. Which image will be used for mixed media and which image will be used for phototransfer? Why? Put the image you will use for mixed media in your sketchbook. Task#1: Tape Cutout your image. Use masking tape across the front of your image. Slightly overlap each layer. Task#2: Spoon Burnish the image to insure the ink has stuck to the tape. Task#3: Water add water to the back of your piece and rub the paper off carefully. Task#4: Dry Task#5: Graphite Transfer Get out your image for mixed media. Cutout out portrait leaving a little border. Add powdered graphite to the back of your image and transfer it to your collage w/ gesso. Bend the collage panel back and forth to make it lay flat before you transfer. Task#6: Closure Add your reflection over this process to your photo-transfer slide. 5th Block eat A lunch!!!! Warm UP: Document
Take pictures of both collage
Task#1: Image 1 edit (Mixed Media Portrait: charcoal/gesso/watercolor)
Task#2: Image 2 edit (photo transfer)
Task#3: Image Drop Add both image to the folder linked below: https://drive.google.com/drive/folders/1dqE-A0a3hVgpraKOvEVTp52lyEs1_Cvd?usp=sharing Task#4: Closure Work on your slides For each collage slide add the following
5th Block eat D lunch Tuesday and Thursday! Task#1: Collage Backgrounds Create two collage backgrounds on the project paper provided
IB Senior Exhibition is currently up at PlantZero. You can view the show anytime from 12-4 between now and June28th. The gallery will not be opened on Monday's. Gallery Critiques: Due Monday, June 3rd If you go to the opening and write your gallery critique one of the shows you will receive 50 bonus points. If you can't go to the opening, but you do go to see the show you will receive 25 bonus points. Gallery critique for this show is modified format
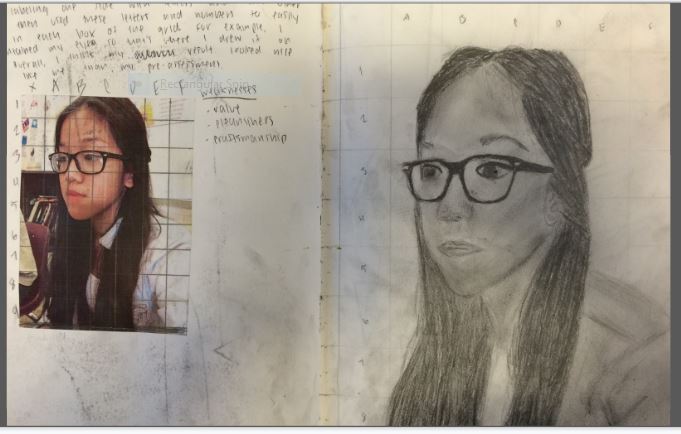
Task#4: Drop Box Using the link below add your (yourname_grid_portrait.jpg) image to the drop box. https://drive.google.com/drive/folders/1Wz48b7d6-P_BcWZ1BGY-9rj9yptu6 Task#5: Sketchbook Grid
Create a 1 inch grid in your sketchbook (right side) Task#6: Label Grid Horizontal (1-7) Vertical (A-J) Task#7: Enlargement You will be creating an enlargement of your image going from 3.5x5 to 6x10. Begin by lightly sketching your outline using the grid format to keep everything in each box proportional and correct. Once you have blocked in your basic outline you can then add in details such as hair line and clothing. Lastly you will add your facial details. Task#8: Document Take a picture of your work at this stage Task#9: Erase You will erase your grid (do not erase your outside border w/ your numbers and letters). Be careful not to erase facial details. Task#10: Add value Begin to define your features by adding value to your image. Task#11: Document Take a picture of your final image Task#12: Closure (Portrait: Grid Enlargement Slide) Create a slide for this task. You will have 4 components on this slide:
4/15-Final portrait angles due Monday (9AM) 4/17-Final Grid Enlargement Slide w/ reflection (Wednesday 9AM) 6/3-Gallery Critique WarmUP: Download and review our unit intro: https://docs.google.com/presentation/d/1uZukJXKYIe8FjuaBLreiX7qzKnyWAB64wsTD-ls9k20/edit?usp=sharing
Deadlines:
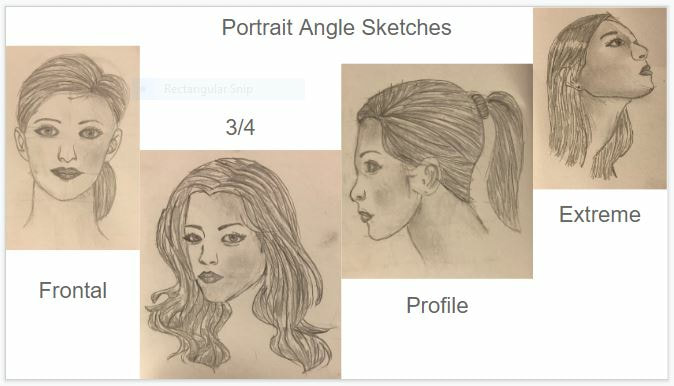
Final proportion self-portrait due (w/ reflection) Wednesday (9AM) Final portrait angles due Monday (9AM) Monday (4/8) Task#1: Using the packet or following the link below create a portrait of yourself that uses correct proportions: http://hhsartmattax.weebly.com/art-2/friday-329-portrait-drawing Task#2: Slides Add this image to your next slide and reflect on the process. Due Wednesday. Task#3: Images Make sure you have several images of yourself saved to your drive folder to use for different processes in this unit. You need images from all different angles (frontal, 3/4, profile, dramatic) by next class.  |
Unit 1: Dwell
Sols AII.2, AII.6 AII.9, AII.20 AII.21, AII.23 Key Concept: Change Related Concept: Innovation and Presentation Global Context: Science & Technical Innovation MYP Assessment Task & ATL Focus: Organization Collaboration Transfer Learner Profile: Risk-taker Knowledgeable Archives
October 2022
|


 RSS Feed
